How to install different kinds of post caps
How to install different kinds of post caps
What is a post capital?
A post capital, also known as a post cap or finial, is a decorative and protective ‘cap’ that is installed on top of a fence or stair post to help protect it from the elements (by covering the exposed end grain of timber posts, or open end of metal posts). Traditionally they were manufactured from timber, but are now also available in a range of different metal finishes such as aluminium and stainless steel. Post capitals are also available in both internal and external varieties.

Types of post-capitals
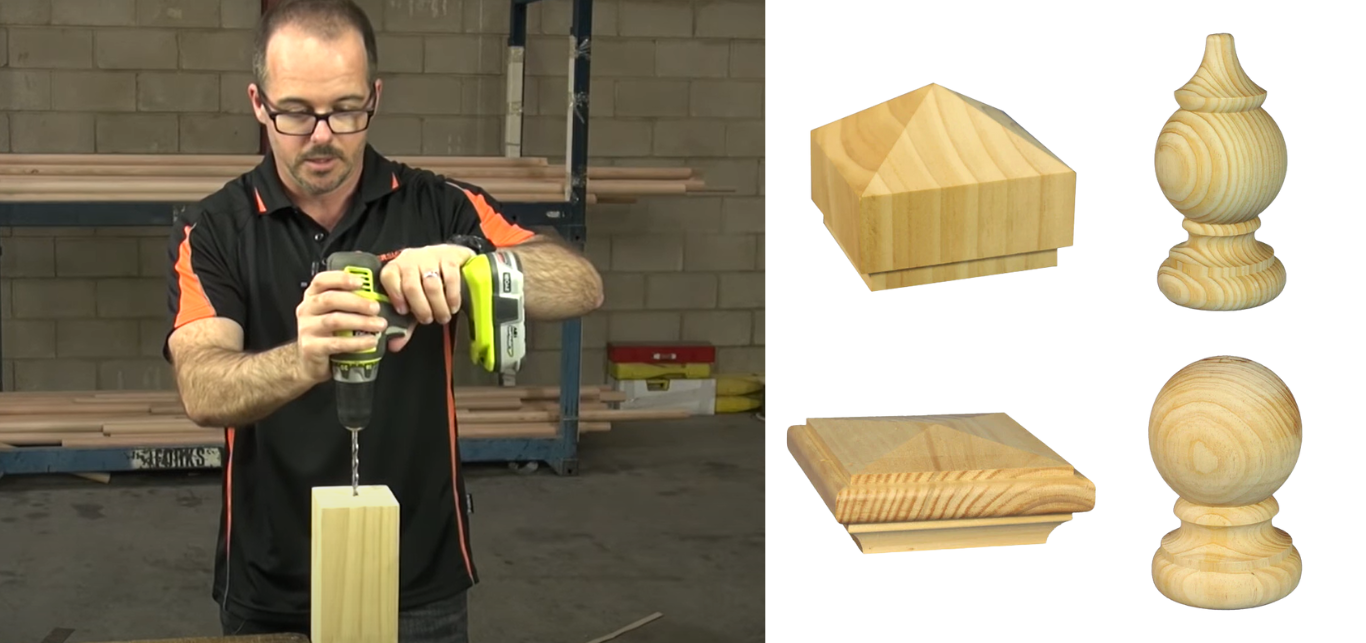
There are two main types of post capitals: ball or top mount capitals, and pyramid and rebated/recessed flat post capitals. While both serve similar purposes, the attachment method and style differ.
Ball or top mount capitals are affixed directly to the top of a post, often featuring a spherical or rounded design that adds elegance and visual appeal. We also sell a pointed fence post capital, that is affixed in the same way. These capitals are typically secured with screws or adhesive, providing a seamless integration with the post.
Conversely, pyramid and flat post capitals are designed with a rebate that allows them to fit snugly onto the top of the fence post. This type of capital drops onto the post, covering its upper surface while enhancing its structural integrity. Pyramid and flat post capitals come in various styles and materials, offering versatility in both design and function.
How to install ball and top mount post capitals
Installing ball and top mount post capitals is a relatively straightforward process that can be done using either double-ended screws or adhesive glue.
Using Double-Ended Screws:

Prepare the Post: Ensure that the top of the fence post is clean and free from any debris or dirt. This will provide a smooth surface for attaching the post capital.
Position the Post Capital: Place the ball or top mount post capital onto the top of the fence post, aligning it centrally and ensuring it sits securely.
Pre-drill Holes: Using a drill bit slightly smaller than the diameter of the double-ended screws, pre-drill holes through the base of the post capital (if these are not already pre drilled. All Hammersmith branded post capitals will come pre-drilled) and into the top of the fence post. Make sure to drill straight down to avoid misalignment.
Attach the Post Capital: Insert the double-ended screws into the pre-drilled holes in the post capital and into the fence post. Tighten the cap securely, ensuring that no thread remains visible.
Check Alignment: Once the post capital is attached, double-check its alignment to ensure it sits level and centered on the fence post.
Using glue or adhesive:
Clean the Surfaces: Similarly, ensure that the top of the fence post and the base of the post capital are clean and free from debris.
Apply Adhesive: Apply a generous amount of adhesive glue to the base of the post capital.
Position the Post Capital: Carefully place the post capital onto the top of the fence post, pressing down firmly to ensure good adhesion.
Hold in Place: Hold the post capital in place for the recommended duration specified by the adhesive manufacturer to allow the glue to set properly.
Check Alignment: Once the adhesive has set, double-check the alignment of the post capital to ensure it is level and centered on the fence post.
Allow to Cure: Leave the post capital undisturbed for the recommended curing time specified by the adhesive manufacturer before subjecting it to any stress or pressure.
How to install pyramid and flat post capitals
Using glue or adhesive:
Prepare the Post: Ensure that the top of the fence post is clean and free from any debris or dirt. This will provide a smooth surface for attaching the post capital.
Position the Post Capital: Place the pyramid or flat post capital onto the top of the fence post, ensuring that it sits securely within the rebate and is centered.
Apply Adhesive: Apply a generous amount of adhesive glue to the underside of the post capital, covering the entire contact surface.
Drop the Post Capital onto the Post: Carefully drop the post capital onto the top of the fence post, making sure it fits snugly within the rebate and is aligned centrally.
Press Down Firmly: Press down firmly on the post capital to ensure good adhesion between the capital and the post.
Hold in Place: Hold the post capital in place for the recommended duration specified by the adhesive manufacturer to allow the glue to set properly. This will ensure a strong bond between the capital and the post.
Check Alignment: Once the adhesive has set, double-check the alignment of the post capital to ensure it is level and centered on the fence post.
Allow to Cure: Leave the post capital undisturbed for the recommended curing time specified by the adhesive manufacturer before subjecting it to any stress or pressure.

